Today I find myself looking through tons of photos of cars trying to find the perfect match for my new book. After some time searching I discovered some great websites that actually sell cheap die cast models of cars. I know this tid bit of info will be extremely helpful later down the road with other projects and with this one. Typically I will be forced to work from photos for most everything I illustrate. Often for more complex objects and characters I have to make models in order to see how the light falls across forms. However I knew there would be no easy way to create my own model of a car from scratch so buying a diecast model should be the perfect solution. Mainly I want to share a couple of links for that as I'm sure others will eventually be faced with a simialr problem.
Secondly I didscovered some amazing diecast models of much older cars like this fire truck which would be a lot harder to go see in person. Buying a diecast could be the solution to doing historical paintings of rare cars. I could even see these older model cars being a great starting point or inspiration for creating futuristic car designs. The older cars have way more class and style than all the new stuff they are coming out with. One link to cheap die cast cars is http://www.diecastmodelswholesale.com/servlet/the-Fire-Engine-Diecast/Categories
there are plenty of websites I found that sell these sorts of things but this is one of the best I found so far. Secondly I found a great website with links to paper models of objects including things like cars, buildings, insects etc. One of the cooler ones I found was this hornet model. You can go on there and download the whole thing, cut it out and glue it together. The link, http://images.google.ca/imgres?imgurl=http://papermodels.files.wordpress.com/2009/09/suzuki-car-sx4-wrc.jpg&imgrefurl=http://papermodels.wordpress.com/category/cars-tractors-boxes-rally-f1/&usg=__FBp_c7hbp1c0KrwQO88au1a7oAk=&h=338&w=450&sz=59&hl=en&start=16&sig2=UeRo2r1ckeCUM3LnN46Lhw&um=1&tbnid=UEUboawEmWx_jM:&tbnh=95&tbnw=127&prev=/images%3Fq%3Dsuzuki%2Bmodel%2Bcar%26hl%3Den%26rlz%3D1T4GWYE_enUS345US345%26sa%3DN%26um%3D1&ei=H80aS4jWO47M8Qa8ueHlAw
Wednesday, December 30, 2009
Saturday, December 19, 2009
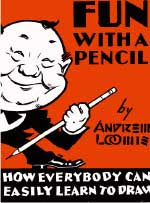
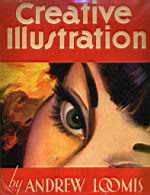
Free Andrew Loomis Books!!!
If you're an illustrator and haven't heard of Andrew Loomis then you will certainly be glad you stopped by this blog. I grew up in a home that was pretty much illiterate (or maybe that should be ill-art-erate) when it comes to art. My exposure to art was my older sisters traced drawings of cartoon characters. I was lucky to have a grandfather who loved art at my age and actually has a HUGE Norman Rockwell collection which he loved to show us whenever we stopped by for a visit. Since art college he has even opened me up to a whole world of his art he created for a mail-art instruction school he participated in at my age. In my senior year of high school I was one of two people in my whole art class who had a hard time passing an art history test my teacher gave us. As I left for college all I knew is that I loved making art and I wasn't too bad at it either.
Unfortunately my poor knowledge of art history persisted throughout most of my art college experience despite the required art history courses for which I actually bought and read the huge text books for. I just couldn't grasp the stuff. However I eventually got tiered of not having an answer to the question that would continually pop up the more I progressed in my art. First people would ask what college I go to or what I do for a living and when I told them I'm an artist they immediately ask who my favorite artists are. For the longest time the only name I had to throw at them was Norman Rockwell. Sure I knew of Picasso, Monet, Gauguin, Michelangelo, etc. etc. and I grew up on Bob Ross and some dude who drew cartoon characters on tv, but I was never really really inspired by any of them. Not initially anyway.
The point I'm trying to make is that I finally broke this bad habit and came across some spectacular artists who i admire and learn from on a regular basis. Without these influences I don't feel i would have been able to pursue my art in the way I have, creating children's books, commissioned paintings, logos etc. So my hope in writing this is that one young artist who may be in a similar situation would start the whole process early. Look at tons of art and find out who is your favorite. Then buy their books, read their blogs, watch their videos, learn from them. Soon I hope to have the time to post a list of artists who I look to for inspiration and guidance whenever I'm faced with challenges. For now I Just want to open your eyes to one artist in particular as he has taught many of the greatest illustrators with his books. That is Andrew Loomis. Unfortunately his books are out of print but luckily I found them for free in PDF form here http://www.alexhays.com/loomis/ . So go download them and start reading! More artists and great resources to come.
Friday, December 4, 2009
Weird mediums
Weird mediums
This is a blog post I have been meaning to write for a while now. I just haven’t been able to find the time. Since I still have not time I’m just going to post a bunch of photos and links from various artists using weird mediums to create art and not say much about each one. Some of these artists have really done some terrific art and it’s worth the time to go check out more of their work.
For some great painted hand art and optical illusions check out http://visualfunhouse.com/body_paint/painted-hand-optical-illusions.html
Won Park makes some amazing money origami. http://orudorumagi11.deviantart.com/gallery/
Scott Wade makes art using dirt smudged around on the back windshield of cars. This is just one sample of his. Check out more at http://www.dirtycarart.com/
A guy on youtube by the screen name of Eclecticasylumart makes are with his food. One sample below shows an image draw with his fingers and BBQ sauce. It’s way more impressive when you watch him make the art before your eye so go check it out. HE uses other food too! http://www.youtube.com/watch?v=j3pz2VgIM7E&feature=related
Eric Daigh was recently featured on the morning news for his pushpin art. Initially I found this to be pretty darn cool but then they showed his process and it kind of ruined it for me since he takes a photo and breaks it into pixels which he follows as a guide to place the pushpins. So I think I’ll stick with monet and van Gogh . http://daigh.com/
Nathan Sawaya sculpts with legos. You may have seen his art on the news as well as he was featured a couple of times over the past two years. http://brickartist.com/
Liu Bolin is known as the invisible man. He actually paints on his clothing and face to match whatever is behind him then spends hours getting a photo of him in just the right position to make himself blend into the background. One sample below, can you find him? Check out http://www.telegraph.co.uk/culture/culturepicturegalleries/5886805/The-invisible-man-Liu-Bolins-camouflage-artwork.html?image=17
Julian Beever uses chalk and concrete for his creations. At least two people have sent me a link to his site so far so I figure he needs to be included in this post. Below is one sample but you deff. Don’t want to miss out on the rest so check out http://users.skynet.be/J.Beever/batman.html
Eric Grohe does murals as well but uses brick Walls for his canvas. http://www.ericgrohemurals.com/projects/diamond.html
Pumkin Carving
Last year I entered the Pumpkin Masters Carving Competition for the first time and surprised myself by winning second place in the faces category. I did a bunch of research on pumpkin carving techniques and set to work. That process produced "Enchanted Lady" pictured below.
So this year I couldn't pass up the opportunity to give it another go. I had to revisit some articles on carving techniques and discovered one sentence which changed my whole approach. One of the articles said something about how small details should be carved by taking away the skin and some pumpkin flesh but not carving all the way through. It also spoke of carving away a bunch of pumpkin from inside out to make the pumpkin walls thicker. This is common knowledge for anyone who does this on a regular basis but for me it was a revelation of sorts. Last years carving was the first I had done since childhood and I had always just assumed that carving all the way through was the way to go. Carving away the skin was almost like doing Scratch art. I also decided to work with a clamp light bulb on an extension cord placed inside the pumpkin while I carved so I knew exactly how much to carve away. I wouldn't advise this for young children or anything as the bulb gets hot but it was a ton of fun for me. Below is my carving for this year. The voting won't be for another month or so.
Every good carving needs a good stating place and this competition requires you send a copy of original carving design. SO below is my design. I never would have even considered drawing such tiny detail work if I had thought I would need to carve all the way through the pumpkin. I projected this design onto the pumpkin surface with an art projector I use for my illustrations, then drew it with a permanent pen that I tested before to be sure it wouldn't rub off when the pumpkin got wet pulp on it.
Fun fact: For some reason I seem to misspell the same words over and over again even when I know the correct spelling. "Pumpkin" is one of those words as I tend to spell it "pumkin". Every time you see that word in this post it was spelled wrong until iwent back to correct it.
Subscribe to:
Posts (Atom)